

How to Use a Ready-Made Invoice Template

How to Use a Ready-Made Invoice Template
If you are looking to simplify the invoice creation process for your project or business, using a ready-made invoice template can be the ideal solution. There is a wide range of professionally designed templates available that allow you to customize invoices according to your specific needs. In this article, we will explain how to use these templates in a simple and effective way, helping you save time and effort while ensuring your invoices look professional and well-organized. Let’s explore the steps needed to set up your perfect invoice!
What Is a Ready-Made Invoice Template?
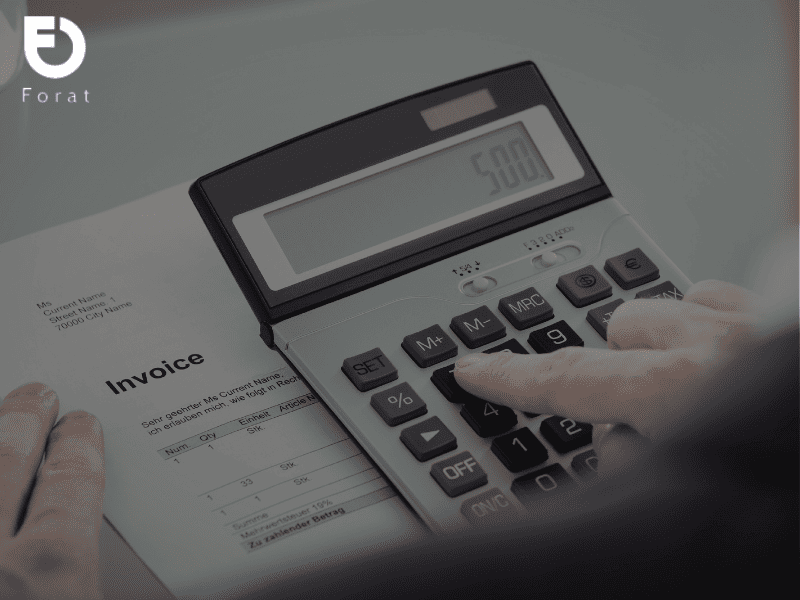
In today’s business world, collecting payments and issuing invoices are essential parts of daily operations. To make this process easier, a ready-made invoice template is provided as a tool specifically designed to help individuals and businesses create professional invoices quickly and easily.
These templates are flexible and customizable, making them suitable for various fields—whether you work in trade, service provision, or as a freelancer. Instead of spending time designing an invoice from scratch, you can simply download a ready-made template from the website and modify it to match your brand identity.
Learn more about electronic invoicing systems.
The Importance of Understanding How to Use It
Understanding how to use a ready-made invoice template from a website goes beyond simply downloading it. It also includes knowing how to correctly fill in the data and use the available tools to enhance the invoice’s professionalism.
Here are some of the key benefits of mastering how to use the template:
- Time-saving: By following clear steps, you can issue invoices more quickly.
- Increased professionalism: Professionally designed invoices reflect a positive image to clients.
- Easy customization: Knowing how to edit the template allows you to easily add company logos, contact details, and other information.
By following the correct steps, you can improve the efficiency of your financial operations and provide a smoother experience for your customers.
You may also want to explore electronic invoicing software.
How to Download the Template from Websites
After learning about the benefits of using a ready-made invoice template from websites, the next step is downloading it. Here are the simple steps that make the process easy.
Steps to Download an Invoice Template
Downloading an invoice template from a website usually requires a few straightforward steps:
- Visit the website: Open your browser and go to the official website.
- Search for the templates section: On the homepage, look for a section labeled “Templates” or “Invoice.”
- Select the invoice template: Once inside the section, choose the ready-made invoice template that best suits your needs.
- Download the template: Click on the “Download” button and save the file to your device.
The download process is typically quick and easy, allowing you to move directly to the editing stage.
Steps to Open and Edit the Template
After downloading the template, it’s time to open and customize it to fit your business needs:
- Open the file: Click on the downloaded invoice file. It is usually in Word or Excel format, making it easy to open.
- Edit the details: Start by entering your company information, such as the company name, address, and contact details.
- Add new items: If you offer specific products or services, insert them into the invoice table and add the corresponding prices.
- Save your changes: Once editing is complete, save the file in a suitable format such as PDF to preserve the layout when printing.
By following these steps, you can easily download and edit the template, making the process smoother and more efficient.
You may also want to explore document and records management software.
Using the Invoice Template from Websites
After downloading and editing the invoice template, it’s time to use it effectively. Issuing professional invoices depends largely on how accurately data is entered and how essential elements are added. Let’s review these steps.
Filling in Invoice Details
The first step is to accurately and clearly fill in the invoice details, which include:
- Client name: Ensure the client’s name matches their official records.
- Invoice date: Record the date the invoice was issued.
- Invoice number: Using a sequential numbering system helps with tracking invoices efficiently.
Accuracy is crucial, as any errors may cause confusion in the future.
Adding Items and Logos
Once the general information is complete, you can add the items you are billing for:
- Item list: Include a detailed list of products or services provided, along with prices and quantities.
- Adding the logo: If your company has a logo, add it to the invoice to give it a professional look. You can insert the image directly into the template using the editing tools.
Including your logo strengthens your brand identity and makes it easier for clients to recognize and contact you in the future.
You can also review Phase Two of electronic invoicing.
Printing or Saving the Invoice
After completing the invoice, you can either save or print it:
- Save the invoice: If you want to keep an electronic copy, choose the PDF format to preserve the layout.
- Print the invoice: Check your printer settings to ensure high-quality output and use good-quality paper for best results.
By following these steps, you can issue professional invoices easily and confidently.
Customizing and Modifying the Template

When using a ready-made invoice template, customization is an important step to ensure the invoice reflects your business identity. Here’s how you can adjust the template to achieve that.
Changing the Invoice Layout
Start by modifying the layout to suit your workflow:
- Reorganize sections: Add new sections or rearrange existing ones if you need to include additional details.
- Adjust column sizes: Ensure columns for items, prices, and quantities are properly sized for easy reading.
A customized layout helps create a distinctive design that leaves a positive impression on clients.
Adding New Fields
If you need to include extra information, adding new fields is a great option, such as:
- Customer notes field: Allows clients to add their own comments regarding the invoice.
- Due date field: Helps remind clients of payment deadlines.
You can easily add these fields using the editing tools in your word-processing software.
Editing Colors and Fonts
Colors and fonts play a major role in enhancing the invoice’s appearance. Consider the following tips:
- Choose brand-appropriate colors: Use colors that reflect your company’s identity. For example, if your brand is energetic, bright colors like red or orange may be suitable.
- Adjust fonts: Use clear, easy-to-read fonts. You can use one font for headings and another for body text to improve readability.
With the right colors and fonts, your invoice will look more attractive and positively influence how clients perceive your business.
Customizing the template makes it more effective and helps it stand out in the marketplace.
You may also want to explore contract management software.
Getting the Most Out of an Invoice Template
When using a ready-made invoice template, maximizing its potential is essential to ensure your invoices reflect your business professionalism. Here are some practical tips to help you achieve that.
Tips to Improve Invoice Appearance
The appearance of an invoice can greatly affect client perception. Consider these tips:
- Use white space: Leave enough space between elements to improve readability and avoid visual clutter.
- Maintain consistent colors and fonts: Use a unified color palette and consistent fonts throughout the invoice to strengthen your visual brand identity.
- Place your logo prominently: Position your company logo at the top of the invoice to increase brand recognition.
Customizing It to Suit Business Needs
Business requirements vary across industries, so customizing your invoice template is essential:
- Identify essential information: Add or remove fields depending on the products or services you offer. For example, consulting businesses may need a field for consultation details.
- Include terms and conditions: Add a dedicated section at the bottom of the invoice to clarify legal and payment terms.
- Highlight special offers: If you offer discounts or promotions, display them clearly on the invoice to attract customer attention.
By applying these tips, you can enhance the invoice’s appearance and tailor it to your business needs, ultimately improving customer satisfaction and overall professionalism.
You may also want to explore customer relationship management (CRM) software.
Frequently Asked Questions
1. What is a ready-made invoice template?
A ready-made invoice template is a pre-designed form used to create invoices that display transaction details between the seller and the buyer, such as prices, quantities, and services provided.
2. Why do I need to design an invoice template?
Designing an invoice template helps to:
- Save time when issuing invoices.
- Ensure a professional appearance.
- Organize information in a clear and easy-to-read format.
3. What are the essential components of an invoice template?
Key components include:
- Company logo
- Company details (name, address, phone number)
- Client details
- Details of products or services provided
- Prices and quantities
- Total amount due
- Payment terms and due date
4. How can I design a ready-made invoice template?
- Choose a suitable design program (such as Microsoft Word or Excel).
- Add the company logo and details, ensuring all information is accurate.
- Create a table for invoice details with columns for quantity, description, price, and total.
- Save the design in an appropriate format such as PDF or DOCX for easy future use.
5. How can I use an invoice template effectively?
- Update the template regularly.
- Use accurate and up-to-date information.
- Review all details before printing or sending the invoice.
Conclusion
Using a ready-made invoice template is an ideal option for individuals and businesses seeking an efficient way to create professional invoices. These templates offer elegant, user-friendly designs that save time and effort during invoice preparation. Users can easily customize essential information such as client details, amounts due, and provided products or services. In addition, these templates are often compliant with local legal standards, enhancing the credibility of issued invoices. By using a ready-made invoice template, businesses can improve financial performance and achieve better organization in their operations.
You may also like
- المقالات
A Comprehensive Analysis of Financial Inclusion in Saudi Arabia
Financial inclusion in Saudi Arabia is considered one of the fundamental pillars for enhancing economic and social development in any country, particularly in the Kingdom of Saudi Arabia, which is
8 min readBy FuratRead article - المقالات
Everything You Need to Know About Electronic Invoice Violations
In today’s fast paced world of e commerce electronic invoices have become an integral part of daily financial operations As their use continues to expand various violations associated with them
6 min readBy FuratRead article - المقالات
Everything You Need to Know About Saudi Accounting Software
In today’s business world, an accounting system is an essential element for the success of any company, particularly in the Kingdom of Saudi Arabia. With increasing legal and commercial requirements
8 min readBy FuratRead article



Frequently asked questions
How can I try the program?
If you are thinking about trying the Furat program, it’s very easy to do so. The program offers a free trial period that allows you to explore all the available features. To start the trial, you can follow these simple steps:
- Visit the official website of the Furat program.
- Click on the “Free Trial” option.
- Fill in the required information to create your account.
- Get immediate access to all the tools that help you manage invoices.
This way, you can see how useful the program is before making a final decision.
What is the Furat electronic invoicing program?
Furat is a system for managing electronic invoices and financial claims. It can also generate electronic receipt vouchers. The program aims to facilitate the process of issuing invoices and managing customers.
How does the Furat program help in managing customers?
The Furat program helps organize customer data, track transactions, and improve communication with them by providing smart marketing tools. It also allows you to store customer data and access it from anywhere.
What are the features of the electronic signature in the Furat program?
The Furat program allows the use of electronic signatures to securely and quickly authenticate transactions. You can sign from anywhere at any time, and it also enables the electronic and secure archiving of all documents.
Can worksheets be customized in the Furat program?
Yes, the Furat program provides the ability to customize worksheets to suit the company's needs and customer requirements. You can also set different and consistent permissions based on the number of employees and their administrative roles.
Can I use the program in multiple countries?
Yes, one of the flexible aspects of the Furat program is the ability to use it in multiple countries. The program allows you to:
- Support different currencies to facilitate invoicing.
- Customize invoices according to the local requirements of each market.
- Access legal documents specific to each country.
A friend of mine who runs a multinational company found that using Furat made it easier to deal with clients in different countries without any complications. This flexibility makes Furat a great choice for companies looking to expand into new markets.
Comments (0)
No comments yet. Be the first to comment.